Price of models varies from $ 50 to $ 600. But the cost of mounting reaches $ 50. Of course, this aspect affects the choice of the optimal garbage disposal. Therefore, many users prefer by yourself to mount inexpensive model. The complexity of the mounting depends on features of garbage disposal. Of course, mounting the mechanical model is much simpler compared to connection of electric device. Mounting instruction of each model usually contains all the steps in form of step-by-step recommendations. But of course, successful mounting requires of elementary skills in electrical and plumbing works. Otherwise, it’s expedient to entrust this work to professionals.
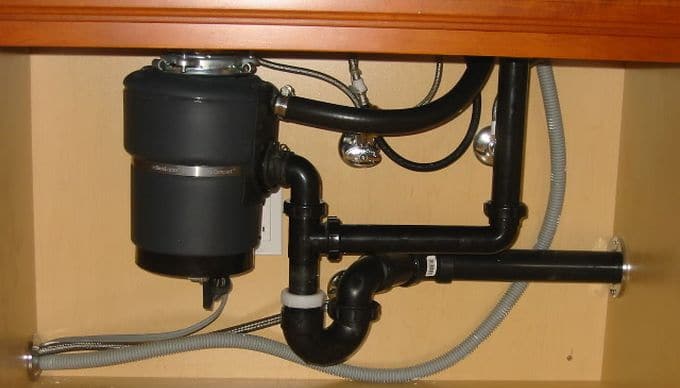
Installation is the assembly of a relatively simple hydraulic system of several parts.
Features
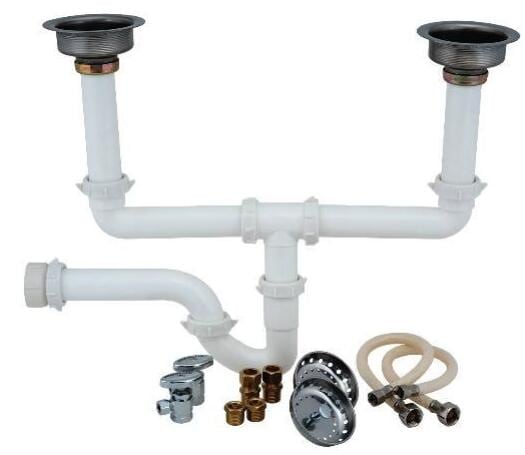
The installation kit for garbage disposal usually contains:
– special hexagonal wrench;
– mounting flange of exhaust outlet with one or two screws, depending on the model;
– outlet with thread;
– rubber gaskets for inlet pipe and on output of device;
– pneumatic button and pneumatic hose for models with built-in air switch.
Mounting the device additionally requires:
– drain pipes;
– air switch with button for models without built-in air switch.
This kit is available in a large range, but its cost is $ 50 and more.
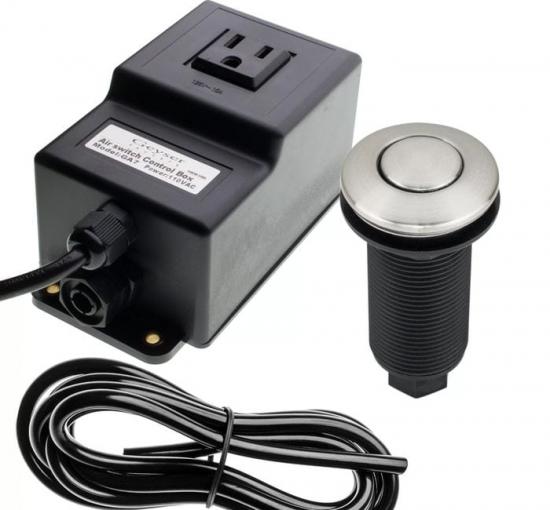
The button is usually located on the upper surface of the sink.

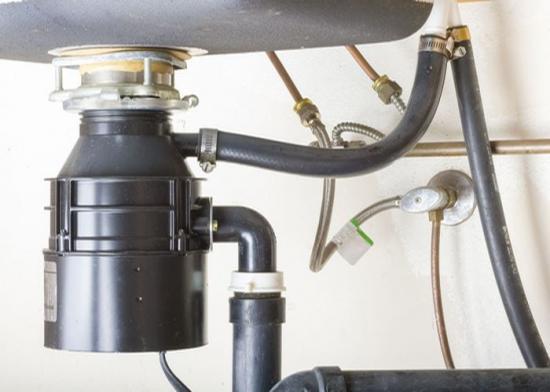
Garbage disposal is mounted under the sink and is connected to the sewer system. Usually, connecting the appliance to the mains uses an earthed socket with protection against moisture.
Of course, corrugated pipe is bad suitable for connecting to the sewer due to accumulation of food wastes on its walls that provoke unpleasant odors. Therefore, pipes with smooth walls are preferred.
As known, norms of European standard envisage the drain holes diameter of 89-90 mm when installing a garbage disposal and all manufacturers are strictly followed this requirement. In case of a mismatch, the diameter of the drain in the sink expands to the required diameter with a special tool.
Stages of installation
Installation includes the following steps:
– the drain pipe is detached from the sink;
– all details of drainage system are cleared;
– rubber pad from kit is placed under the sink flange;
– a special mounting bracket is attached to the sink by means of appropriate details from kit;
– the device is connected to the mounting bracket;
– garbage disposal is connected to a draining pipe of sink with the help of additional plastic adapters that can be sold separately;
– the other end of drain pipe is connected to the drain.
The absence of air switch requires installation of additional wiring and of a separate switch.
But some models do not envisage of separate switch. They are switched with the help of turning lid on the neck. The lid is inserted into the drain hole and acts as a switch.
This video demonstrates the correct installation of the device.